Hi
I have had numerous requests for my template for the reindeer, I don't have any fancy gadgets to make a PDF or the likes and I just drew the pattern free-hand, so this is the best I could do.
To save the template right click on image above and save as image to your computer, from there open up word and click and drag the saved jpg into the word doc, should print to size. See images below for placement of eyes, nose and antlers. That's the best I can do.
Please note I am happy to share this template but please don't copy and sell the template.
Thanks for all your lovely comments. Happy creating.
Paola
Monday, October 26, 2009
Sunday, October 25, 2009
Santa Claus is coming to town? ! ?
Hi, hope you have all been having a fab weekend.
I've been busy...... The theme over on the Winter Wonderland Blog is an open one this week and at Pals Paper Arts(PPA13) the challenge is anything but a card.
Every year for the past three years I have been assigned the task of decorating the tree at my youngest sons school for their annual Santa Claus visit. This year the task falls to me again. I always like to decorate the tree with some sort of treat holder which get handed out to each child on their departure (almost like a party favor). Needless to say I have to make about 80 of these so I get started early, especially as I am writing my final exams at the moment all the way through to the end of November
: ( . The reindeer head is folded over to make a holder for a candy cane(see below).


Edited to add: Please see post dated 26.10.2009 for a template for the reindeer.
I've been busy...... The theme over on the Winter Wonderland Blog is an open one this week and at Pals Paper Arts(PPA13) the challenge is anything but a card.
Every year for the past three years I have been assigned the task of decorating the tree at my youngest sons school for their annual Santa Claus visit. This year the task falls to me again. I always like to decorate the tree with some sort of treat holder which get handed out to each child on their departure (almost like a party favor). Needless to say I have to make about 80 of these so I get started early, especially as I am writing my final exams at the moment all the way through to the end of November
: ( . The reindeer head is folded over to make a holder for a candy cane(see below).
I then made shortbread cookies with my boys and the idea came to me to convert the reindeer into a cookie holder too....
Here's a back view so you can see how the cookie is attached. I put it into a cello bag, made two holes at the base of the reindeer head, tied ribbon through and tied the bag to the back of the head, I then glued the ribbon over the holes in the front.

I made the reindeers all a little different.


While I was making the reindeer the creative juices started flowing and I also made these using my circle punch.


And here's what they all look like together....
TFL
Blessings
Paola
Tuesday, October 20, 2009
Polka dots and red high heels....
My mom is 79 this year and she has always spoken about a pair of red stillettos and a polka dot dress she wore as a young lady, so we decided to do the decor for her party as... you guessed it... red high heels (template here- Ellen Hutson) and a matching handbag.
TFL
Paola
Monday, October 12, 2009
Another Tree box
Hi
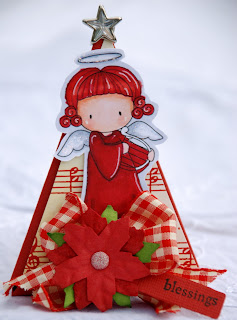
I am really enjoying making these "tree" boxes, so here is another one. Still using angel Emma.
Paola
I am really enjoying making these "tree" boxes, so here is another one. Still using angel Emma.
Materials Used
- Bazzill Basics Card Stock
- Cosmo Cricket DP
- Copics
- Angel Emma Digi from All That Scraps
- Sizzlets mini tags
- Stickles Diamond glitter
- Pointsettia, glitter brad
Paola
Sunday, October 11, 2009
Christmas tree Boxes
Hi
The challenge over on the Creative Inspirations Challenge blog is the make a Christmas card or project and as I needed to make just that I decided to play along.
I am planning to make some Bead Angel bookmarks (see below), so I wanted an angel themed box for them to go inside. I'm still toying with the idea of putting string through the top of the box so that they can double up as tree ornaments.
Here is what the box looks like completed, it opens from the side-really cool. After I die cut the holly leaves using Core'dinations card I scored them down the center and sanded them for dimension.
I love these little tree boxes, find the template HERE.
Materials Used
- Bazzill Basics Card Stock
- Core'dinations Card Stock
- Making memories Mistletoe DP
- Copics
- Angel Emma Digi from All That Scraps
- Sizzix Holly Die and Sizzlets mini tags
- Stickles Diamond glitter
- Pointsettia, glitter brad
Paola
Pop up Gift card holder
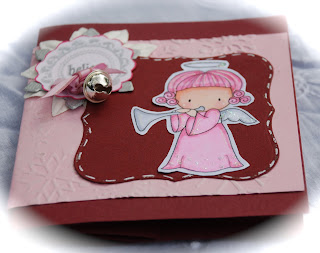
This is a gift card holder I made for the Project Tuesday challenge. I love this new digi image from All That Scraps. Head on over to the Project Tuesday site as they have a link to a tutorial for this card holder, so go check it out.
You can't see to well from the pics but the wings and halo are all sparkly as well as sparkles on her sleeves and edge of her skirt. I also highlighted Believe by going over it with my Spica Glitter pen.
Materials Used:
Bazzill Basics Card Stock
Fiskars clear stamps- Believe
Momento inks
Angel Emma Digi from All That Scraps
Label 1 die from Spellbinders
Spica Glitter pen-Silver Twinkling stars
Stickles Diamond glitter
Cuttlebug Snowflakes embossing folder
Flower and die cut snowflake- behind believe tag
TFL
Paola
Tuesday, October 6, 2009
Jog my memory- Booklet- Christmas Gift idea
Hi
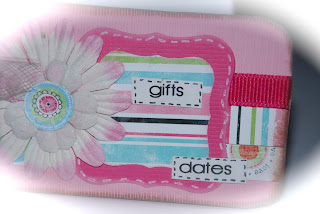
I don't know about you, but my memory is not all that great. I often think of gift ideas for friends and family even the teachers and when it comes time to buy I can't seem to think of that perfect gift. So I decided to make this little booklet to keep in my bag to record details as and when the opportunity arises, for example when my mom-in-law sees something on a shopping trip and says she would really like it!
The faux stitching on the Label 1 die is also for the Crazy for Challenges challenge to use stitching on your project.
Here is a view of the open booklet.
I used Fiskars clear stamps and my Label 1 Nestie die. The papers are Bo Bunny, Adornit and Bazzill linen card stock.
I think I am going to make a few as stocking stuffers for family members for Christmas.
TFL
Blessings.
Paola
I don't know about you, but my memory is not all that great. I often think of gift ideas for friends and family even the teachers and when it comes time to buy I can't seem to think of that perfect gift. So I decided to make this little booklet to keep in my bag to record details as and when the opportunity arises, for example when my mom-in-law sees something on a shopping trip and says she would really like it!
The faux stitching on the Label 1 die is also for the Crazy for Challenges challenge to use stitching on your project.
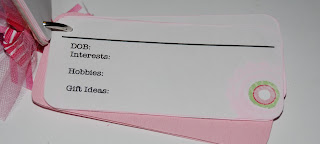
I made the pages in word and if you right click on the image below and save as, you can then click and drag the saved jpg into a word document.
Here is a view of the open booklet.
Below is one of the pages filled out just to give you an idea of how I use this booklet.
I used Fiskars clear stamps and my Label 1 Nestie die. The papers are Bo Bunny, Adornit and Bazzill linen card stock.
I think I am going to make a few as stocking stuffers for family members for Christmas.
TFL
Blessings.
Paola
Boo!
Hi
I love the Pile it on challenge as you get to try and incorporate as many challenges as possible into your project.
The following treat bag I made is 3D for the Pile it on challenge, the colors are from the color challenge on The Pink Elephant blog, the stitching is for the Crazy for Challenges blog and the Halloween theme is for the Fun with shapes and More challenge.
The template can be downloaded HERE. Just print it directly onto your card stock cut, score and assemble-easy peasy.
I actually printed the template onto plain printer paper then tore my papers and glued them to the back of the template before cutting and assembling, so as to get the torn layers. The stamp is from Making memories, I used the back of the stamp for the gray background and then stamped the feet over the gray background. I did some faux stitching along the torn edges, sort of Frankenstein style (LOL!).

Put in some treats and away you go.
TFL
Paola
Subscribe to:
Comments (Atom)




 :< /a>


