CLICK HERE FOR FREE BLOGGER TEMPLATES, LINK BUTTONS AND MORE! »
Showing posts with label Christmas Gift Ideas. Show all posts

Monday, December 13, 2010

Santa's sack


Hi Fellow Crafters'

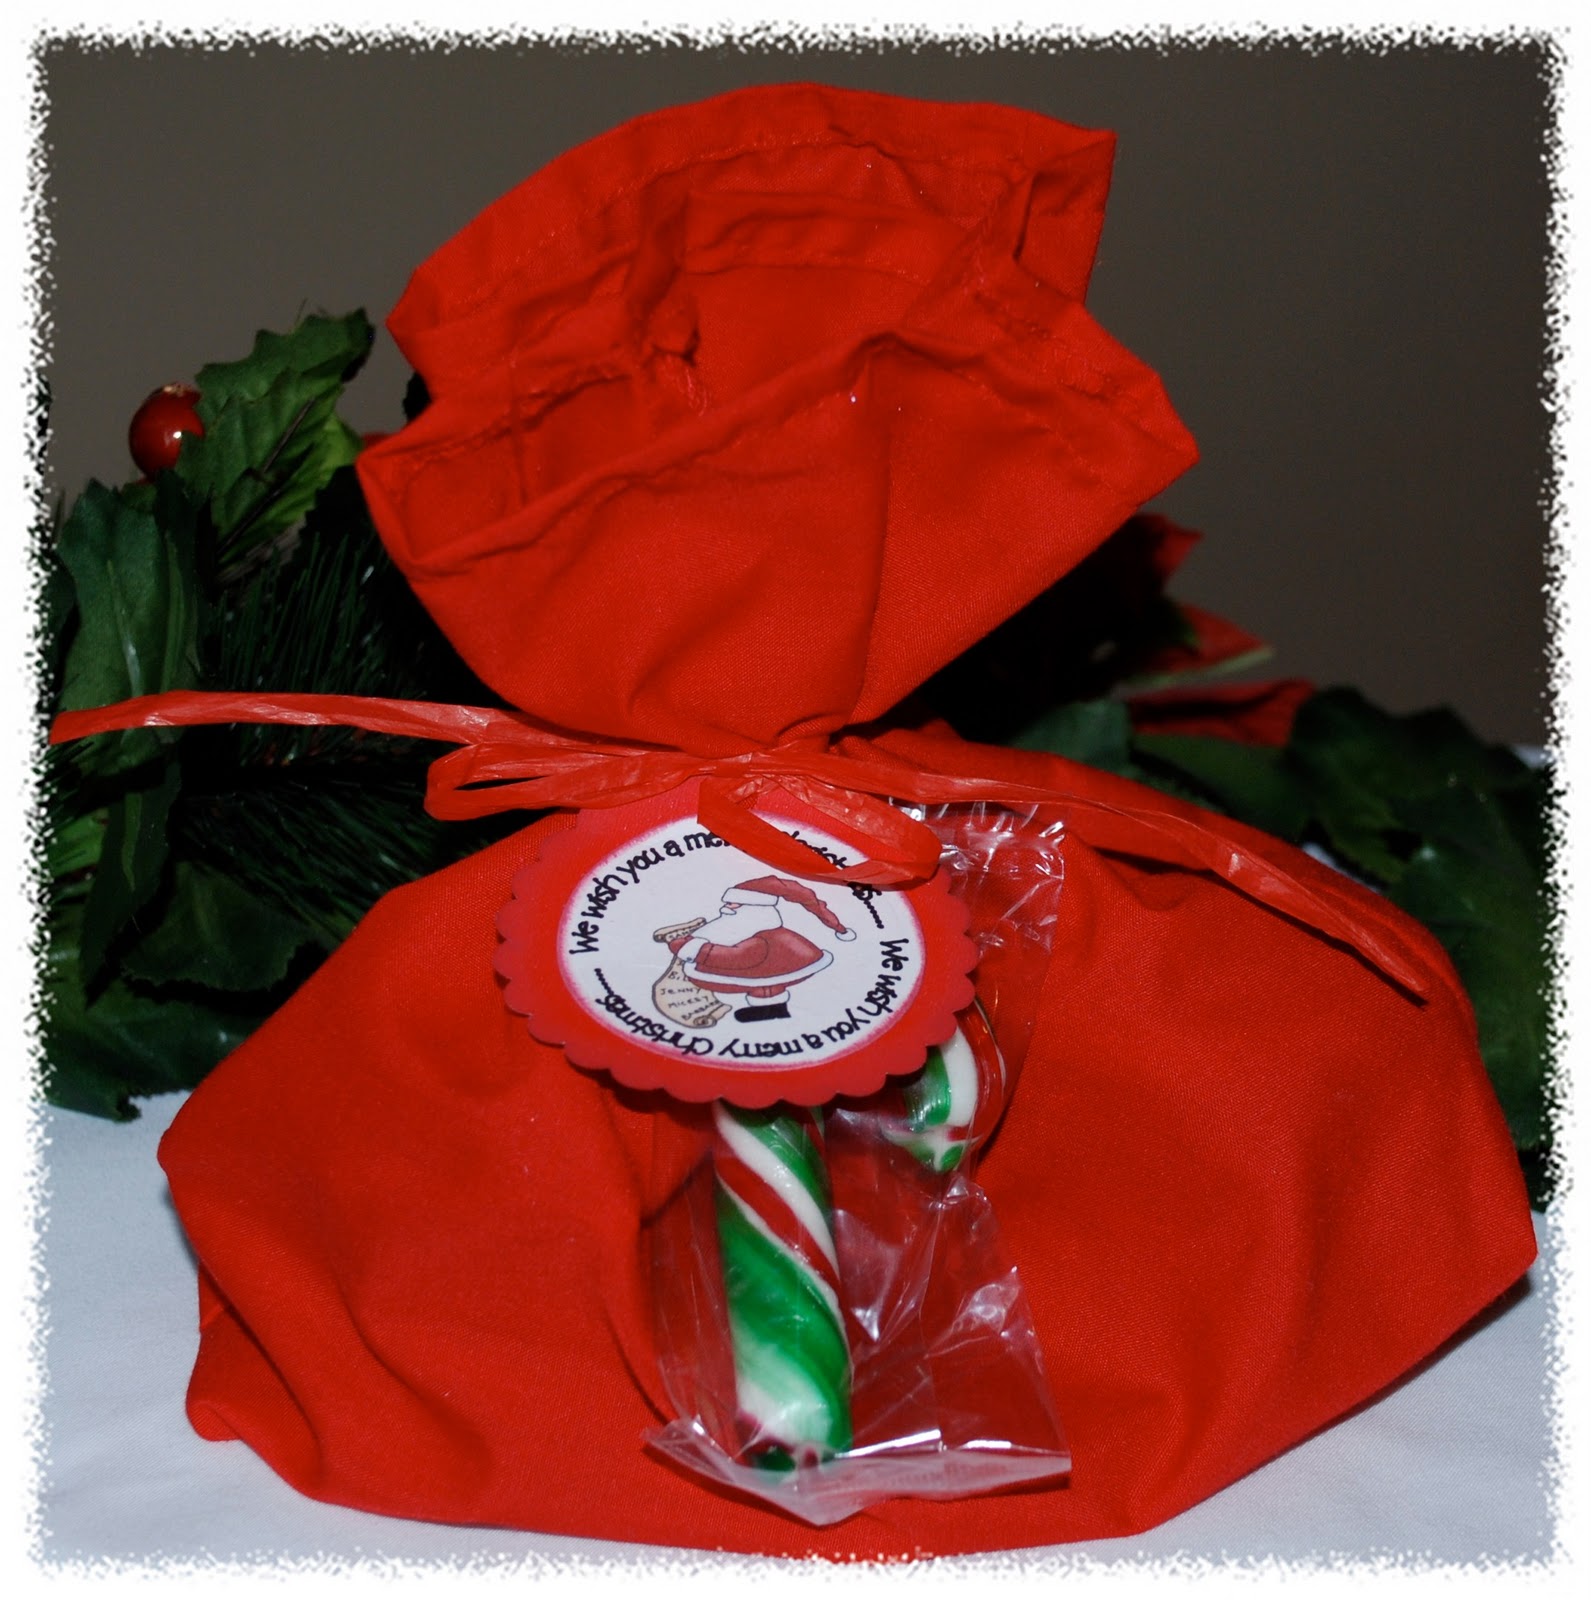
For the kids in my class as a farewell gift (we finished our school year on Friday), I decided to make these little Santa sacks (you can find countless tutes on how to make similar totes around the web). But here is a  photo of the bottom of the bag to give you an idea of what I did.

One of the things I put inside was a little tub of homemade glittery, cinnamon play dough.

I made up a batch and then divided it between smaller containers. This is the easiest and best play dough recipe I have ever made and it really does last for months, if kept in an airtight container.


The Recipe:

2 cups all purpose flour
1 cup salt
4 tsp cream of tartar
2 Tsp vegetable oil
2 cups boiling water
food coloring of choice ( I have used gel, liquid and powdered food coloring and all work equally well)
1 Tsp glitter (color of choice)
1 Tsp ground cinnamon
1 tsp all spice
{Note: Tsp = tablespoon, tsp = teaspoon}

The Method:
1. Place all the dry ingredients into a mixing bowl, stir together with spoon
2. add the food coloring, oil and boiling water
3. mix together using an electric mixer - I use the K-beater attachment on my mixer
4. add in the glitter, cinnamon and all spice, mixing all the time until well blended
5. allow to cool slightly and store in an airtight container.

Another variation I tried for my class for fun was to add cocoa to the above recipe- the kids loved the chocolate - cinnamon smell.

Happy crafting.


Saturday, November 27, 2010

Pop on over - freebies and a tutorial

HI Fellow Crafter's

After seeing this blog post on how to make your own microwave popcorn, I came up with the idea of using homemade micro popcorn as favors or even an invitation!

I settled on the idea of using them as an invitation to a Christmas movie marathon.


The back of the tag.


Here's what I did :
1. Take a brown paper bag. I had red ones so I used them. Place 1/4 cup of popcorn (your normal everyday one) into the bag.


2. Fold down the top edge twice and secure with a piece of sticky tape (no it does not melt in the microwave- if you were wondering :-) )

3. Sticky tape side up, fold both ends towards the center, overlapping slightly.
4. Embellish as desired. Place a note on the back that reads: (Free to use: Click and save)


Here is the tag for you to use: (Free to use: Click and save)


Some other ideas I have for the microwave popcorn.
- Gift as a DIY popcorn garland. Wrap a length of string with a needle around the micro popcorn.


- Gift as a Pop on over Santa request for your kids class mates.


Another suggestion if you only have the brown bags is to make a sleeve in a Christmassy color or using Christmas DP to go around your bag.

Happy Crafting.

Sunday, September 26, 2010

Santa Hat Gift Card Holder with Tutorial

Hi Fellow Crafters'

Edited to add: I have linked this up for the challenge over at Winter Wonderland-> here.

Hope you have been having a super week-end. I got up this morning with an idea running around my head for some gift card holders I need to make for Christmas gifts for my boys' teachers in early December. So I got drawing and cutting. This is what I came up with for one of them.


 And here is how I did it:
Step 1: Print out the template - just right click and save as, then print.

 Step 2: Cut out all the pieces, note cut 2 of the hat trim.
Step 3: Add glue to the outer edge of one of the pieces of hat trim as shown below, don't put glue all
            the way around!

                Add the second piece on top of the glue.

                  It should look like this when glued together.
Step 4: Insert the red part of the hat into the opening.

 Step 5: Make a hole and insert a split pin on the left hand side making sure to go through the red hat  
             portion as well.


                   Once split pin inserted and secured check that the hat "opens", by swiveling the red part
                   upwards.
Step 6: Add the pom pom to the top of the hat.
Step 7: Turn card over and inset the gift card in the white portion as shown.
Step 8: You are finished. Decorate as desired.


I'd love to see your creations if you use this template - remember for personal use only please.

Happy crafting

Saturday, December 12, 2009

"Hugger" with a tutorial (of sorts!) and 2 freebies

Hi

Another gift idea I put together today for my DHs cousin, which has to be given tomorrow, as we will not be seeing them on Christmas day.


Now for the how to - I barely sew so this is a real novice attempt at a tutorial and pattern (LOL) so apologies up front.

Grab the pattern by right clicking on the image below and save image as. Once saved open the file and print. Seam allowance has been included and as I used felt I sewed as close as possible to the edge to avoid bulkiness.

Materials needed:
Felt                - white, red, orange  and black
Fibre filling  - to stuff the head and the body
Elastic          - for the arms and legs
Velcro          - to keep huggers hands together
Red Wire     - for earmuffs
Glue            - for eyes
Embroidery floss - mouth
Sewing machine

FREEBIE:


Here is how I made up his huggers aka springy arms and legs:
1. Cut the elastic into 4, 41/2" pieces.
2. Cut the arms and legs from white felt
3. Take the arm and leg pieces and attach the velcro to each piece.


4. Take the arms and legs and folding the piece of felt in half, attach the elastic to the top and bottom of the felt (see pics below)
 

Sew along the length of the arm and leg pieces pulling the elastic as you sew. This is what you should end up with.
 

5. Attach the arms and legs to the body where indicated on the pattern by the marks ---, ensure the legs are on the inside of the 2 body pieces before sewing so that when the body is turned inside out the legs and arms with be on the outside of the body.

6. Turn body the right way, stuff the body. Run a gathering stitch around the "neck" of the body and pull tight, sew it closed.

6. Take the head pattern piece and run a basting sick around the head, fill with fiber, and pull stitching shut, sew it closed.

7. Sew the carrot/nose piece (should cut one piece only for the nose) together and stuff with fibre fill - attach the carrot/nose to the snowman's face.

8. Cut the eyes and mouth out and place them on the snowman's face. Embroider the mouth using black embroidery floss. Highlight the checks (I used a pink Copic maker).

9. Take the ear muff circles and again run a basting stitch around the circle, filling it with fibre fill and creating small circles. attach a piece of wire or a pipe cleaner to hold the muffs together( I sewed my ear muffs onto the wire I used).

10. Cut the scarf out and make fringes in the bottom of the strip.
      Place the scarf on the snowman, embellish as desired.

'


FREEBIE: Right click on image below- it is the template (created by me) to the tag I attached, I actually used my Copics to color the tree after I printed it.


TFL

Happy Crafting
Paola
http://www.clickinmoms.com/cmprodaily/wp-content/uploads/2011/09/pinit.jpg”

Friday, December 11, 2009

Have you seen all the tutu tutorials around the web!

Hi

I have seen some really great tuts for tutus (here is a good one), and I just HAD to give one a try to give as a gift. While I was making the child sized one, it dawned on me to make a matching one for a teddy to be added to the gift which could also be used on the recipients other smaller dolls- so they can play dress up together (LOL).

I also couldn't stop at the tutu so I purchased a cheap t-shirt and added some sparkle and made a wand to go with too.
 Not clear from images but I added strands of
ribbon at intervals around the tutu and added
a double bow to the front of the tutu.


Close up of top and tutu:
    Used glitter applique glue to make the "glitter" beads
    around the neckline.

And the wand: I used a length of place that is hollow and inserted a ribbon through trying a large bead to the top and bottom, I pulled it tight so that the top bead doesn't flop around, added some ribbons around the top and viola- super easy.


And she needs something to carry this outfit in now!

So I made this, you can find instructions for the tote/purse here (Note: scroll down the page to get to the tutorial on this link).


Here is the little teddy with its own "itty bitty" tutu (can be used on other dolls as well).


Added a ballet shoe charm to the tutu and
free cut a felt crown to turn the ted into a
ballerina princess.


Thanks for looking.

Happy Crafting
Paola